

Mosaic Manual
How to join overlapping lunar tiles into one seamless image with Functions › Mosaic…: preparing the tiles, the dialog, what you get, troubleshooting, and how to render the result.
When your camera's field of view is smaller than the Moon, you can photograph it in several overlapping tiles and join them into one full-disk image. Functions › Mosaic… joins the tiles for you, much like Microsoft's Image Composite Editor (ICE), but inside BiggSky and without leaving your project.
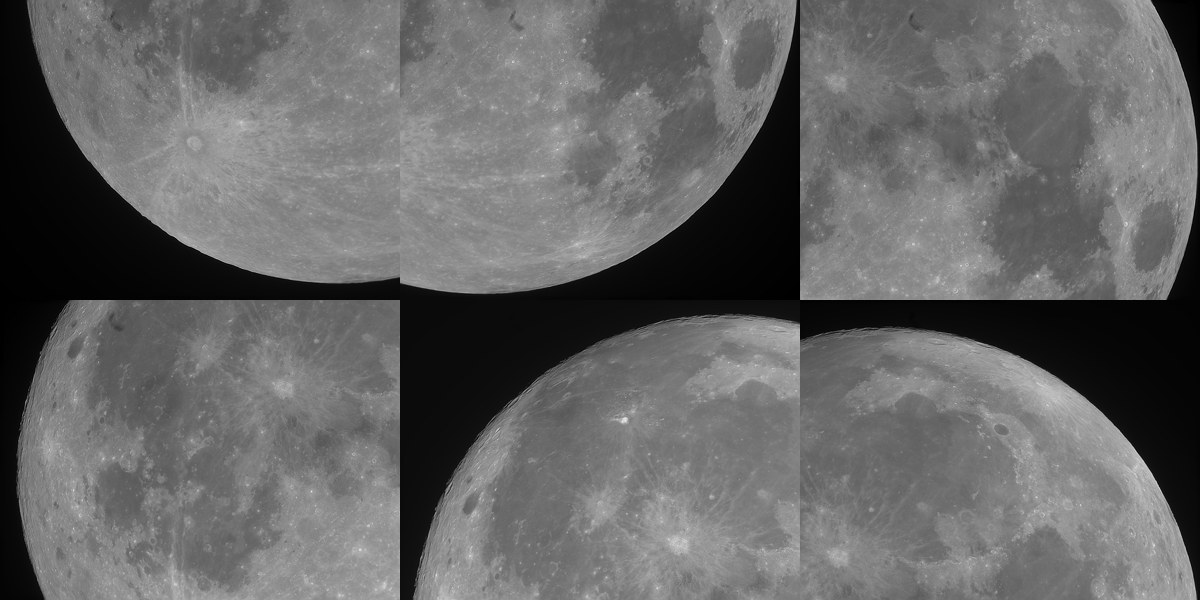
BiggSky:
- lines the tiles up to a fraction of a pixel, allowing for a small rotation and a slight difference in scale between them;
- matches their brightness, so a feature has the same brightness in every tile it appears in, even when the tiles were stretched or exposed differently, and removes vignetting (the darkening toward the corners of each frame);
- blends the tiles so that no seams show.
The result is saved as a new image and added to your project as a new dataset.
Mosaic is in BiggSky SSE Lite, SSE Pro and Universe. It is a solar system tool – it joins overlapping lunar and solar panels – so BiggSky DSO and BiggSky Free do not include it.
Quick Start
You need two or more overlapping tile images of the Moon, already stacked and deconvolved (for example each tile's ..._Decon_View_16b.png).
- Put the tiles in a dataset. In your project, add the tile images as a dataset: press the Add button beside the Datasets list and select all the tile images together. Then select that dataset in the list. Or skip this step: if the selected dataset has no tile images, Mosaic asks you to choose the tile files in step 2.
- Choose Functions › Mosaic…. If BiggSky asks which images are the tiles, pick the View folder (the first in the list).
- Press OK in the Mosaic dialog. The defaults (similarity, multiband, brightness and vignetting matching, local alignment on) suit almost every lunar mosaic.
- Wait under a minute (six 16-megapixel tiles, or fifteen 2-megapixel panels, on our test PC). The mosaic appears on screen as a new dataset,
<dataset>_Mosaic, and is saved in a Mosaic folder beside the tiles.
Check the result. The message lists how closely the tiles lined up (a few tenths of a pixel is typical) and anything that went wrong, such as a tile that could not be placed. To see where the seams fell, open <dataset>_Mosaic_Layout.png in the Mosaic folder.
If something is missing or looks wrong, see Tips and troubleshooting at the end of this page. The rest of this page explains the options in detail.
Before you start: capturing and processing the tiles
The mosaic can only be as good as its tiles. For the best result:
- Overlap the tiles by 20–40%. BiggSky finds each tile's position from the detail they share, so the more overlap, the more reliably and accurately it lines them up. Our example tiles overlap by about 35%.
- Keep the camera's orientation the same for every tile. A small rotation (a degree or two) is handled automatically, but the tiles must not be rotated by large amounts, and they must all have the same image scale (same telescope, camera, Barlow and binning).
- Cover the whole Moon, plus some sky. Any part of the Moon that no tile covers is left as a gap.
- Process every tile the same way. Stack and deconvolve each tile's video with the same settings (Do It All on each video, or a saved profile, makes this easy). The tiles do not have to be stretched identically: BiggSky matches their brightness. Different filters work too, but a tile taken through a different filter can show different contrast or sharpness, which brightness matching cannot hide.
- Put the tiles in one dataset. Make a dataset whose frames are the tile images, for example the View images (
..._Decon_View_16b.png) of each tile's decon, with Add Dataset. The order of the tiles does not matter: BiggSky works out where each one goes.
Tip: use View images (rendered, 16-bit) when you want the mosaic to look as BiggSky shows the tiles. Use the 32-bit decon images (..._Decon_32b.tif) when you want to stretch the finished mosaic yourself, and choose Output format: tif_ps to save it as a 32-bit file.
Making the mosaic
- Select the dataset of tiles in the Datasets list.
- Choose Functions › Mosaic….
- If the dataset's frames have decon images, BiggSky asks which images are the tiles: one of the decon folders (View folders are listed first), or the dataset's own frames. If the selected dataset has no images to use (a raw video, for example), BiggSky asks you to choose the tile image files instead. You can choose any two or more PNG, TIFF, JPEG or BMP images.
- Set the options in the Mosaic dialog (below) and press OK. The defaults are right for almost every lunar mosaic.
The progress bar shows each step, and Cancel stops the mosaic. Mosaic follows the Use GPU and Use CPU Multi-Core settings, like stacking and deconvolution, and gives the same result either way. Six 16-megapixel tiles take about 20 seconds on the GPU (25 on six CPU cores, 30 on one); fifteen 2-megapixel panels about 18 seconds. When it is done, a message tells you what was done, what it ran on, and where the files are, for example:
6 tiles stitched into 7482 x 7740 in 36 s (6 CPU workers).
Registration: 11 overlaps matched to 0.23 px rms (similarity).
Local alignment: each tile bent by up to 1.0 px so the overlaps agree.
Brightness: tile gains 0.88 to 1.09; mismatch 0.0550 -> 0.0030.
Vignetting: 1.5% at the tile corners.
Scaled by 0.944 to fit the range.
Written to ...\Tiles1\Mosaic: Tiles1_Mosaic_16b.png, Tiles1_Mosaic_Layout.png
Added as dataset Tiles1_Mosaic.
The new dataset is selected, so the mosaic is on screen right away.
The first line says whether it ran on the GPU, on N CPU workers or on 1 CPU thread. If the GPU fails part-way (it runs out of memory, for example), BiggSky finishes on the CPU and the message says so: Blended on the CPU: the GPU failed (…). The result is the same.
The Mosaic dialog
The dialog remembers your answers until you close BiggSky.
| Setting | What it does |
|---|---|
| Geometry | How each tile may differ from its neighbors. similarity (default): a shift, a small rotation and a small change of scale. affine: also allows a slight stretch or shear; try it if the overlaps do not line up well with similarity. translation: a shift only, for tiles you know are neither rotated nor scaled. In our example the tiles differed by about 0.03° in rotation and 0.05% in scale, which is 2–3 pixels across a frame, so a shift alone is not enough. |
| Blending | multiband (default): seamless. Each part of the mosaic takes its fine detail from one tile, so nothing is doubled or blurred, while brightness is blended gradually over hundreds of pixels. feather: the tiles fade into each other across the overlap; fine detail is averaged there, which can soften it slightly. none: hard seams, each pixel from one tile. Useful to see where the seams are. |
| Match the tiles' brightness | 1 (default): gives each tile a brightness gain and offset so they agree where they overlap. 0: uses the tiles as they are. |
| Correct vignetting | 1 (default): also removes the darkening toward the corners of the frames. BiggSky assumes the same falloff for every tile, because they were all taken with the same optics, and for every color channel, so the correction cannot tint the corners. Only used when brightness matching is on. |
| Edge trim | Pixels left off every edge of every tile, to keep out edge effects of stacking and deconvolution. Default 8. Rows and columns that are entirely black at a tile's edge (alignment padding) are always left off. |
| Crop | none (default): the mosaic covers every tile's whole extent. Corners that no tile reaches are filled with a smooth model of the sky fitted to the sky around them. It follows the glow fading away from the Moon and joins each tile's sky without a step, and it has the sky's grain, so the filled corners do not show even under a strong stretch such as CLAHE or a logarithmic one. covered: the mosaic is cropped to the largest rectangle that the tiles cover completely, so there are no filled corners. |
| Local alignment | 1 (default): bends each tile very slightly so that the tiles agree exactly where they overlap (see What BiggSky corrects). 0: each tile is placed as a rigid whole. Leave it on; turn it off only to compare. |
| Suffix | Blank (default): the output goes to the Mosaic folder, named <dataset>_Mosaic. With a suffix, for example v2, everything is named Mosaic_v2 instead – the folder, the files and the new dataset – as the Stacking and Decon suffixes work, so a second mosaic with other settings does not overwrite the first. Letters, digits, - and _. |
| Output format | png (default) or tif: a 16-bit image. tif_ps: a 32-bit floating-point TIFF with the values scaled from 0 to 1, the same as TIF PS in the Save Options; Photoshop and GIMP open it, and so does BiggSky. Choose tif_ps to keep the full precision of 32-bit tiles, or to stretch the mosaic in another program. |
What you get
The mosaic is saved in a Mosaic folder beside the tiles (Mosaic_<Suffix> with a suffix), named after the dataset (and the decon folder, if you chose one):
| File | What it is |
|---|---|
<dataset>_Mosaic_16b.png or _16b.tif | The mosaic, 16-bit (Output format png or tif). Gray tiles give a gray mosaic, color tiles a color one. This file is added to the project as the dataset <dataset>_Mosaic. |
<dataset>_Mosaic_32b.tif | The mosaic as a 32-bit floating-point file scaled 0 to 1 (Output format tif_ps), for Photoshop, GIMP or BiggSky. It is the file added to the project instead. |
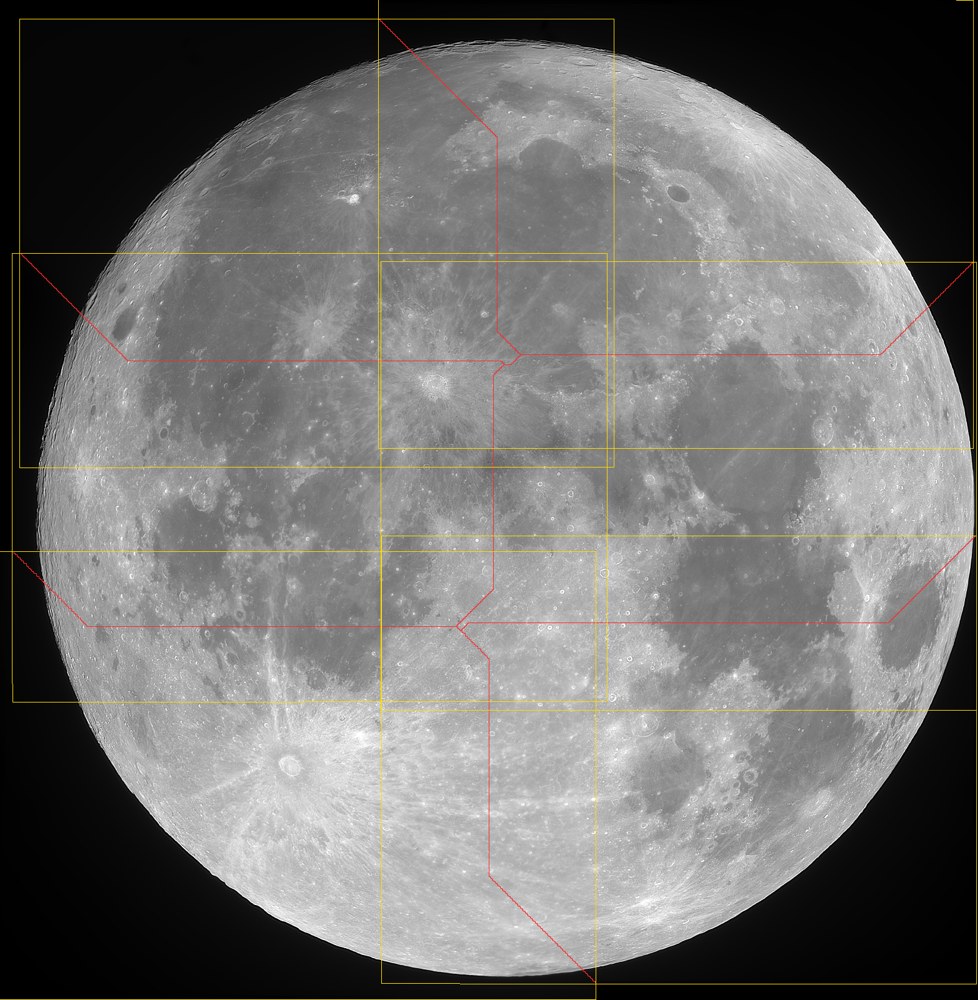
<dataset>_Mosaic_Layout.png | A small copy of the mosaic with each tile's outline in yellow and the seams in red, so you can see how the tiles were placed. |
Color tiles of the Moon or Sun are white-balanced once more after they are joined: BiggSky runs the same automatic lunar white balance it uses on a lunar stack (it makes the brightest parts of the disk neutral) on the whole mosaic, with your Auto Background setting, and the message reports it, for example White balance (lunar, whole mosaic): R 1.000, G 1.000, B 1.004. There is no need to re-balance each tile before the mosaic: BiggSky matches each tile's colors to its neighbors' anyway, so a balance applied to a tile alone does not survive, while the whole disk gives the balance the most to work with. Do it before Color Boost, which magnifies any cast left.
The mosaic is at the tiles' own image scale: one mosaic pixel is one tile pixel. If the brightness matching would push the brightest parts of the mosaic past white, the whole mosaic is scaled down a little to fit, and the message says by how much.
What BiggSky corrects
- Position, rotation and scale. BiggSky works out which tiles overlap and lines them up to a fraction of a pixel, including a small rotation or change of scale between them. All the tiles are placed together, so small errors do not add up across the mosaic. The message reports how closely the overlaps line up: a few tenths of a pixel is typical.
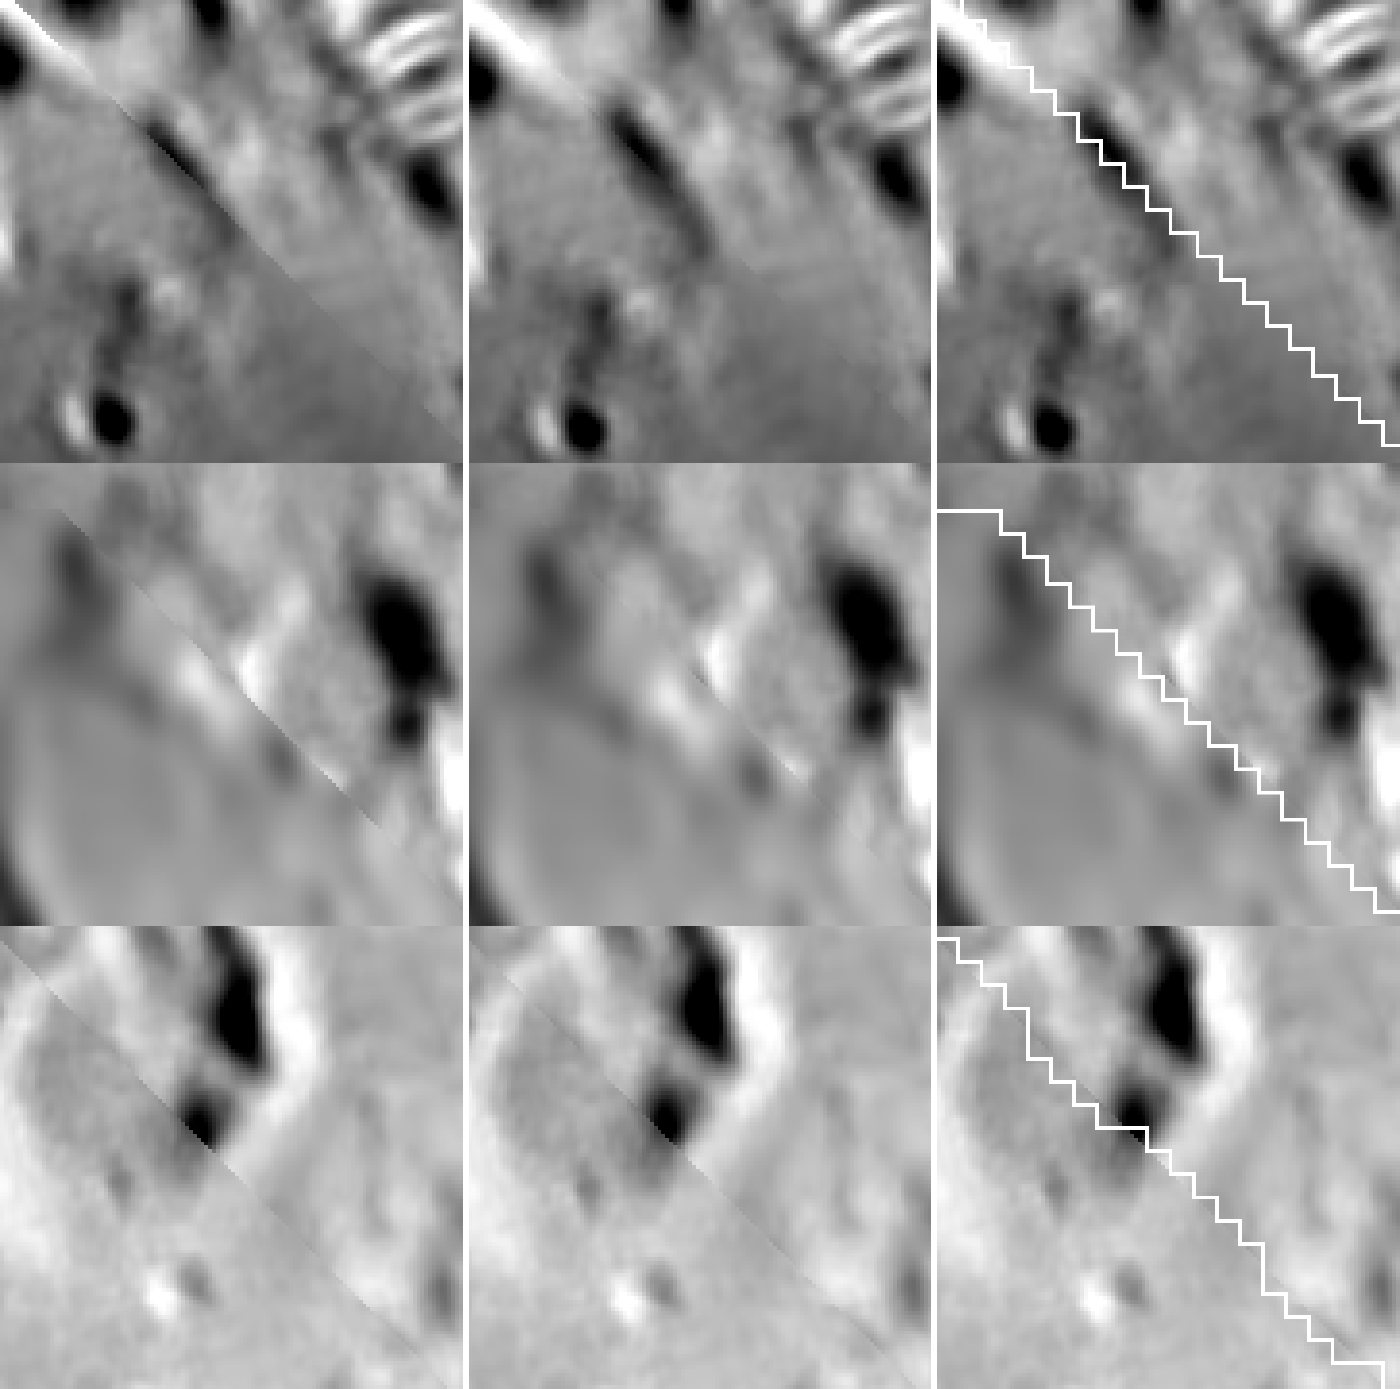
- Distortion inside each tile (local alignment). A stacked tile is not perfectly rigid. Each one carries a little distortion of its own, mostly from the seeing during its capture, so two tiles can disagree by a few pixels in one part of their overlap and agree in another. No shift, rotation or scale can remove that. BiggSky bends each tile smoothly by the small amounts needed (typically 1–3 pixels) so the tiles agree where they meet, and leaves the rest of each tile as it is. The message says how far the tiles were bent.
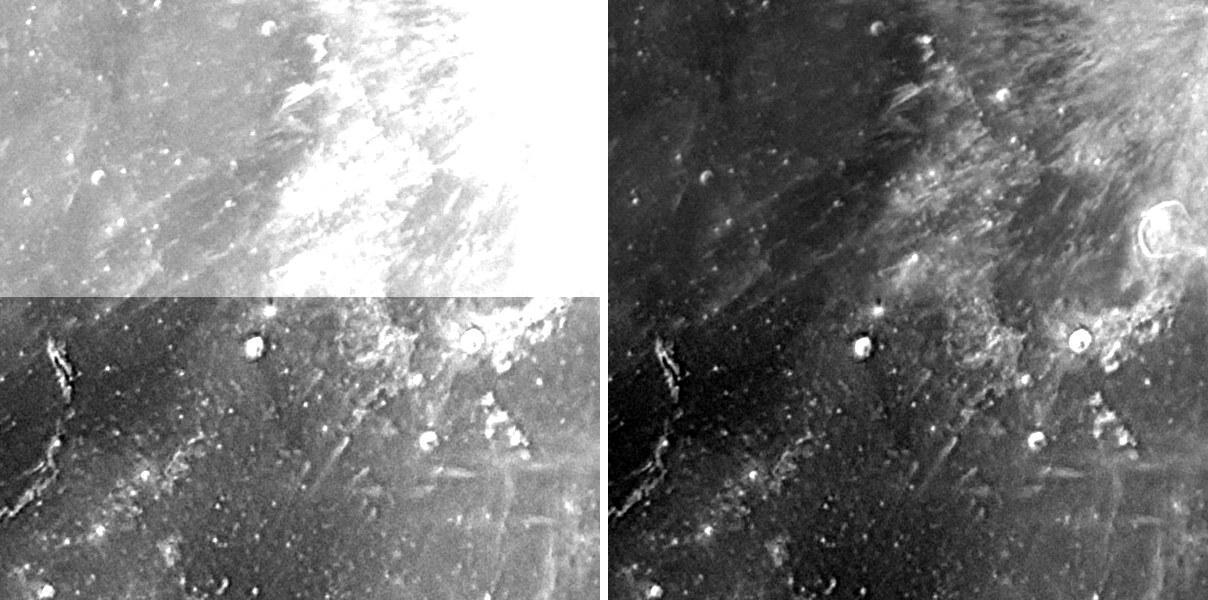
- Brightness, black level and vignetting. Each tile gets its own brightness and black level, and all share one vignetting correction, so a feature has the same brightness in every tile. The dark parts are matched too: tiles rendered separately each have their own black level, and on a crescent the night side of one tile can be ten times brighter than the next. Glow from a low or full Moon, thin cloud and scattered light can also vary across a frame; BiggSky evens that out where the tiles are dark, so the sky and night side of neighboring tiles meet at the same level, without changing the lit Moon.
- Seams. Each seam runs through the middle of its overlap, where both tiles are furthest from their edges. Fine detail stays sharp right up to the seam, so nothing is doubled or blurred, while brightness changes gradually across it.
Tips and troubleshooting
- "Left out (no overlap with the rest found)" or "Left out (its overlaps could not be matched)": BiggSky could not place that tile against the others. Check that it belongs to this mosaic and overlaps its neighbors by enough: overlaps down to about 110 pixels wide are matched, but 20–40% of the frame is much safer. A tile that is mostly sky or shadow can also be hard to place. The tile is named in the message and is not in the mosaic. When a whole row or column of tiles is left out together, the overlap between that row and the rest was too thin or too dark.
- "Placed by the lunar limb, then matched": the tile's overlaps could not be matched at first, so BiggSky found where the tile goes from the edge of the Moon (the curve of the limb in the tile, against the full disk traced by the other tiles), then matched its overlaps there. It is lined up as well as any other tile.
- "Placed by the lunar limb and the detail along … edge, without enough matches to confirm it": the tile was placed from the limb and corrected by comparing the detail along its edge with its neighbor, but there were too few matching features to confirm it. Check the seams there: it can be off by up to about 20 pixels. When a group of tiles is named, the others were matched to the tile named first, so they move together. A wider overlap with that tile fixes it.
- "Placed by the lunar limb only": the tile shares too little detail with its neighbors, so it was placed from the limb alone, to within roughly the number of pixels given. Check its seams, and capture it again with more overlap if they show. A tile that shows no limb (one that lies wholly on the disk) cannot be placed this way, and is left out as before.
- "Tiles A and B still differ by 2.3 px rms after local alignment": these two tiles do not line up well even after bending. Usually one of them has very poor seeing (a stack of few frames, for example) or is a different processing of the same area. Leave the tile out of the dataset (exclude it with Select), or process it again.
- "… is the same view as …: left out": two tiles show exactly the same area (the same image added twice, for example). The second is ignored.
- A gap at a corner: no tile covers that part, and BiggSky has filled it with a model of the sky fitted to the sky around it, which continues the glow fading away from the Moon. It is not image data. Far from any tile, or in a thin strip right beside the limb, it is an estimate and can be a little lighter or darker than the real sky. Use Crop: covered to leave such corners out, or capture another tile.
- The last few dozen pixels of sky at the edge of the coverage are eased onto the same model. The sky in stacked tiles darkens slightly toward their edges (a few percent over the last 50 pixels), and without this it showed as a dark rim where the tiles end. The grain is kept, and nothing near the lit Moon is changed.
- Faint patches in the sky or night side under a strong stretch: the dark levels are matched to about 0.03% of full scale, but scattered light from a low Moon or thin cloud differs from tile to tile, and an extreme local-contrast stretch can find what is left. Use the CLAHE settings in Rendering the mosaic below, which keep the dark parts dark.
- A tile looks softer than its neighbors: the mosaic cannot add detail a tile does not have. Process that tile again, or capture it again in better seeing. Multiband blending keeps each tile's detail sharp up to the seam, so the difference shows only as a change in texture.
- Sharpening the mosaic (Functions › Unsharp Mask…): keep Protect sky checked, as it is by default. Then the sky and night side are not sharpened, so their grain and any faint patches are not made stronger. Sharpening does not create the gray or black shapes that strong stretching can show; they are in the mosaic before it is sharpened.
- To see where the seams are, run the mosaic once with Blending: none, or look at the
_Layout.pngfile. - Excluded frames (Select) are not used, so you can try a mosaic without a tile by excluding it.
Rendering the mosaic: CLAHE
The mosaic is shown and saved with the Render settings of its dataset, like any image in BiggSky. A mosaic of View tiles looks right with the default Clip render. To bring out the relief and the maria across the whole disk, choose CLAHE on the Render tab. CLAHE stretches the contrast in each part of the image separately, so the terminator, the maria and the bright highlands all get their share. It is also a strict test of a mosaic: it shows any step a seam leaves.
What suits a mosaic depends on how much of the frame is dark, which depends on the phase:
| Phase | Source | Distribution | ClipLimit | NumTiles | Why |
|---|---|---|---|---|---|
| Crescent to quarter | Clip | uniform | 0.0075 | 8 | Much of the frame is black sky and night side. The Lunar default distribution, rayleigh, lifts all of it to gray (about 5% of full scale) and shows the glow around the limb; uniform keeps it black. |
| Gibbous to full | Clip | uniform | 0.0075 | 8 | The flat lighting near full Moon has little relief, and CLAHE brings out the albedo: maria, rays and bright craters. Uniform keeps the sky dark gray (about 3%); rayleigh turns it lighter gray (about 9–10%) with a visible halo. Rayleigh at 0.005–0.0075 gives a gentler, more natural disk if you crop to the disk anyway. |
For every phase:
- ClipLimit sets the strength. 0.005 is gentle; 0.0075 brought out about 25% more local contrast on our mosaics without making the maria grainy; 0.01 gave the maria a grainy look; 0.02 is harsh and flattens the image.
- NumTiles 8 suited mosaics of 4,000–8,000 pixels across; 12 looked almost the same. The tiles are square counts (8 means 8 x 8), so on a tall crescent each is taller than it is wide.
- Source stays Clip, the Lunar default: Reinhard compresses the bright disk.
These were tested on the two example mosaics in this page: a crescent (15 panels) and a full Moon (6 tiles). In between, start from the row nearer your phase and compare at 100% zoom.
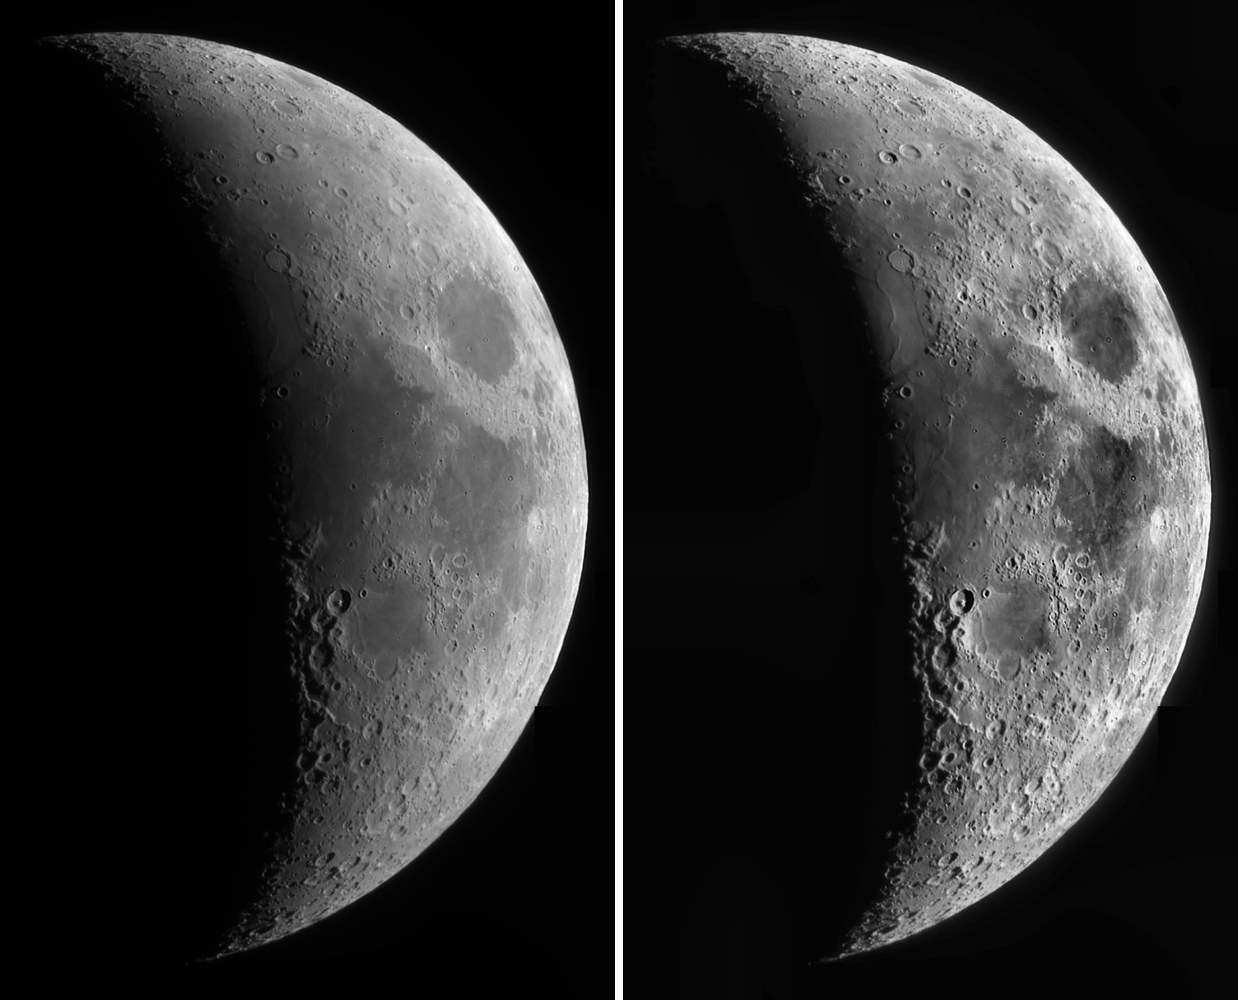
Images of the fifteen-panel crescent Moon: David Richards. See also the Mosaic overview and the full BiggSky manual.