

Unsharp Mask Manual
Finish a deconvolved image the way you would in GIMP or Photoshop, without leaving BiggSky – and without touching your Decon result. The Unsharp Mask dialog sharpens the image you are looking at, or a whole set of finished frames; the decon’s Sharpen settings do it as part of every run.
Many imagers finish a deconvolved image with an unsharp mask in GIMP or Photoshop to make the detail "pop". BiggSky can do this for you, in two ways:
- The Unsharp Mask dialog (Functions › Unsharp Mask…) sharpens the image you are looking at: a stack, a decon, the Calc result, or a single frame. With All Frames it sharpens a whole set of finished images, such as the frames of a planetary animation.
- The decon's Sharpen settings (the Decon Expert table) sharpen as part of every decon run, so the result is saved with the decon and is repeatable.
Either way, the sharpened image goes to Calc. Your Decon result is never changed.
How it differs from the unsharp mask in GIMP
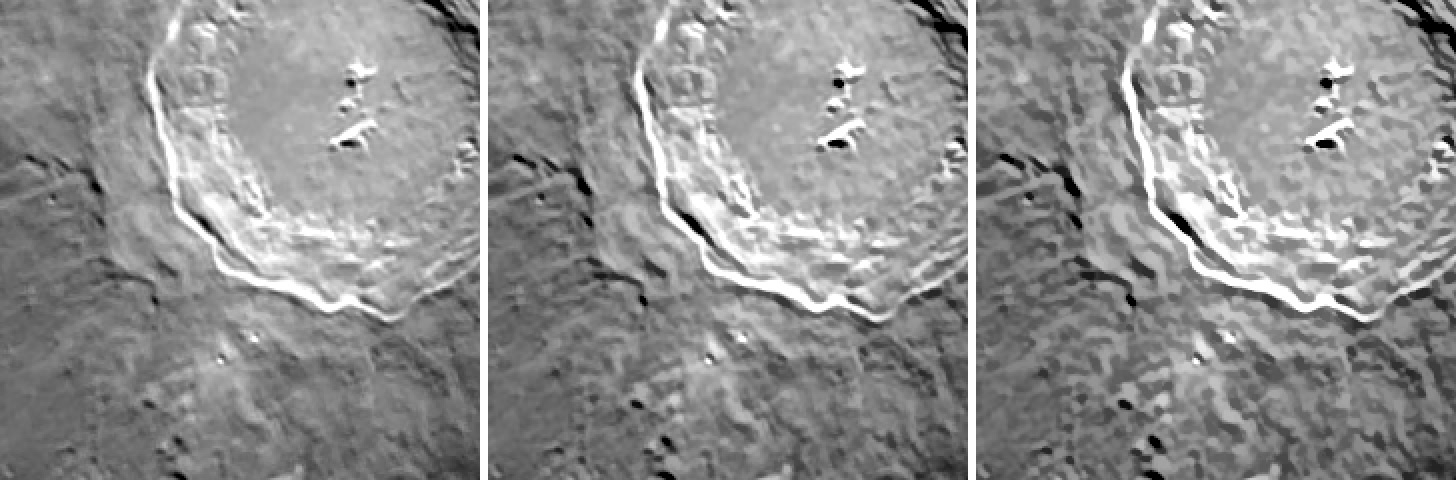
An unsharp mask boosts detail smaller than its radius. BiggSky's version works the same way and its Amount and Radius mean the same as GIMP's, with five differences.
| GIMP Unsharp Mask | BiggSky Unsharp Mask | |
|---|---|---|
| Finest detail | Boosts everything below the radius by the full amount, down to single pixels, so the noise is boosted as much as the detail. | The boost rolls off at the Finest detail frequency, where the image's signal falls into the noise. You get the same look at medium scales with much less grain: on a lunar decon, the same mid-scale boost added 20% to the noise instead of 48%. |
| Radius | In pixels of the image you are working on. | In capture pixels (the camera's pixels). On a super-resolution (1.5x or 2x) stack, BiggSky scales the radius for you, so the same setting gives the same look at any super-res. |
| Halos | Bright rims get dark halos, and shadow floors are pushed below black and clip. | The Halo clamp keeps every pixel within the range of its neighbors in the original image, plus a small margin. |
| Repeats | Each application sharpens the already sharpened image. | Every Apply starts again from the original. Use Passes to get the effect of applying it more than once. |
| Sky | Sharpens the black sky and the Moon's night side like everything else. There is no detail there, so it only adds grain, and a bright ring just outside the limb. | Protect sky fades the sharpening out on the sky and the night side, so they stay as they were. |
Converting your GIMP settings. Use the same Radius, in capture pixels, and the same Amount. If you applied the mask more than once in GIMP, set Passes to the number of times. For example, GIMP's amount 0.5 applied twice is Amount 0.5, Passes 2. Its peak gain is (1 + 0.5)² = 2.25, the same as one pass at 1.25.
How much is right? BiggSky's decon already restores the detail that the data supports. On our lunar test data it reaches 77–96% of the best achievable contrast, depending on scale. Filling that gap exactly needs a boost of only about 5% at 20 pixel scales and 15–30% at 5 pixel scales (this is what SharpenFill does). A typical GIMP setting (radius 4.4, amount 0.5) boosts 4–10 pixel detail by about 50%, beyond what the object really has. That is a matter of taste, not of restoring detail, so BiggSky leaves the Amount to you. Start low, around 0.3–0.5, and compare against the Decon view at 100% zoom.
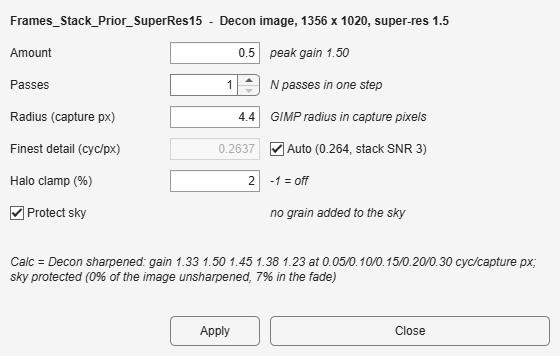
The Unsharp Mask dialog
Choose Functions › Unsharp Mask…. The dialog works on the image of the view that is showing: the Frames, Stack, Decon or Calc view of the selected dataset.
The title line shows the dataset, which view's image is being sharpened, the image size, and the super-resolution factor when there is one.
| Control | What it does |
|---|---|
| Amount | How strong the sharpening is. The finest detail that is still boosted is multiplied by up to 1 + Amount. The hint next to it shows the peak gain, including Passes. Default 0.5. |
| Passes | Applies the mask this many times, in one step. Passes 2 at Amount 0.5 is the same as applying 0.5 twice in GIMP: a peak gain of 2.25. Default 1. |
| Radius (capture px) | The size of the detail that is boosted, as GIMP's radius, in the camera's pixels. Larger radii also lift larger structures, which is closer to local contrast. Default 4.4. |
| Finest detail (cyc/px) | Where the boost rolls off, in cycles per capture pixel (0.5 is the finest detail a camera pixel can hold). Detail finer than this is left alone. With Auto checked BiggSky sets it for you (see below). |
| Auto | Finds the frequency where the image's signal falls to 3 times its noise, and rolls off there. The text says which measurement it used: stack SNR 3 when the dataset's stack and its noise model are available, which is the most reliable; image noise floor when only the image itself can be read; default when neither works. |
| Halo clamp (%) | How far, as a percentage of the image's brightness range, a sharpened pixel may go beyond the darkest and brightest pixels around it in the original. 2% removes the dark halos on crater rims and the clipping in shadows while keeping the sharpening. -1 turns the clamp off. Default 2 for Lunar and Solar, and -1 (off) for Planetary, where the clamp flattens fine low-contrast structure such as Saturn's rings. A value you change is remembered for that target type only. |
| Protect sky | Leaves the sky and the Moon's night side unsharpened (see below). On by default. |
| Apply | Sharpens the image and shows the result in the Calc view. You can change the settings and press Apply again: each Apply starts from the original image, not from the last result. |
| All Frames | Only on the Frames view of a dataset with more than one frame. Sharpens every image of a set of finished images, such as an animation (see below); not for raw videos. |
| Close | Closes the dialog. The last result stays in Calc. |
The result is shown as Calc: Sharpen, displayed with the same Render settings as the view it came from, so you can switch between the two views to compare. The settings are remembered until you close BiggSky.
Protect sky
The sky around the Moon or a planet, and the Moon's night side, hold no detail, only noise. Sharpening them only adds grain. With Protect sky checked, the sharpening fades out where the image is dark: there is none below 5% of the object's typical brightness, the full amount above 20%, and a smooth blend between. This is the same rule Color Boost uses, and it is measured above the sky's own level, so a stretched image whose sky is dark gray rather than black is handled too.
On a 14-panel crescent mosaic, three passes at Amount 0.5 made the grain on the sky and night side 2.9 times stronger. With Protect sky the grain there stayed as it was (0.98x), while the lit surface kept all its sharpening. The blend covers about 5% of that image, along the terminator and the limb, and it also removes the bright overshoot ring the mask draws just outside the limb.
Protect sky does nothing when there is no sky in the image, such as a crop of the lit surface alone: BiggSky checks for that, so the darkest mare is still sharpened. Turn it off to sharpen faint detail on the night side, such as earthshine. The message line after Apply says how much of the image was left unsharpened.
Protect sky does not remove gray or black shapes that are already in the image, such as limb glow or a missing mosaic corner. Sharpening does not create those; they were there before.
Note: if you open the dialog again on the Calc view while Calc still holds its last result, it sharpens the original image again rather than the sharpened one. To sharpen something else in Calc, such as a Color Boost result, apply that last.
Sharpening a set of finished images: All Frames
On the Frames view of a dataset with more than one frame, the dialog has an All Frames button. It shows how many frames will be processed.
All Frames is meant for a set of finished images that you want to look the same, usually the frames of a planetary animation:
- the deconvolved images of a rotation series, for example a Jupiter key every 20 minutes through the night (Run Decon on a frame set gives you the
Frames_Decondataset), or - the frames made from them by Derotate Interpolate (one frame a minute, for a smooth rotation movie), or
- a few stacks of the same object that you want to sharpen with exactly the same settings.
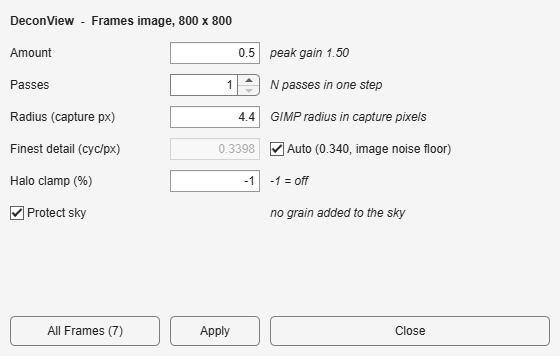
DeconLRGB_View_16b folder). All Frames will sharpen all seven with the settings shown.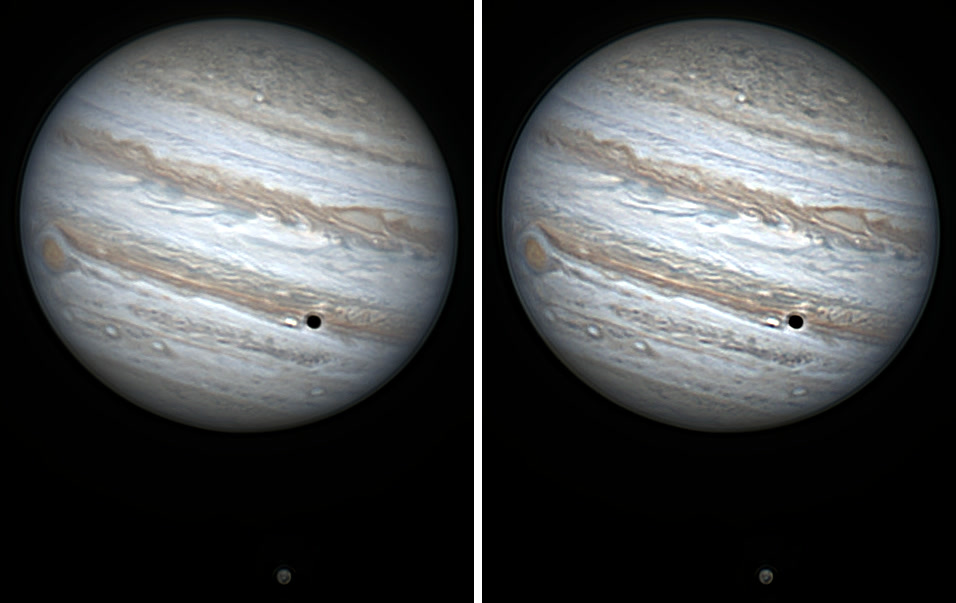
Do not use All Frames on a raw video. On the Frames view of a SER or AVI capture, All Frames would sharpen every raw frame: thousands of them. That takes a long time and fills your disk (5000 frames of 1024 x 768 are about 16 GB as 32-bit files). It also does nothing useful. A raw frame is mostly noise at the scales an unsharp mask boosts, so Auto has to set the finest detail very coarse (0.12 on a lunar frame, against 0.26 on the stack of the same video), and what is left gets sharpened along with the noise. Sharpened frames must not be stacked either: stacking and deconvolution need the original data. Stack and deconvolve first, then sharpen the result. To sharpen a single raw frame, to see how it looks, use Apply.
All Frames:
- Loads each frame, with your darks, flats, debayering and flips applied, as the Frames view shows it. Frames you have excluded are skipped.
- Sharpens it with the dialog's settings.
- Saves it with _Sharpen added to its name, for example
2023-10-29-0250_4_Jup_..._DeconLRGB_View_16b_Sharpen_32b.tif. It uses the 32-bit or 16-bit Data format from Save Options and their sub-folder setting, in the project's output folder. - Adds the files to the project as a new dataset named after the original with _Sharpen added, for example
DeconView_Sharpen. Then the dialog closes.
A progress window shows how far it has got, and has a Cancel button. If you cancel, or a frame cannot be read or saved, no dataset is added. Frames already saved stay on disk.
Tip: to make the animation, select the new _Sharpen dataset and use the Movie tab as usual. Choose the settings with Apply on one frame first, then press All Frames. It uses whatever the dialog shows at that moment.
Sharpening as part of the decon (Expert settings)
The same sharpening can run at the end of every decon. It is set in the Decon Expert table, or with --decon on the BiggSkyCLI command line, and it is off by default. When it is on, the decon saves two results:
- Decon (
..._Decon_32b): the deconvolved image, exactly as without sharpening. - Calc (
..._Decon_Sharpen_32b, and its View images): the sharpened image.
The steps after the decon run in this order: Decon, then Blend (when Blend Decon % is on), then Sharpen, then Color Boost. Each works on the result of the one before. The Calc file name says what was done, for example _Decon_Blend10_Sharpen or _Decon_Sharpen_ColorBoost. A tiled decon is sharpened once, after the tiles are put together, so there are no seams.
These are rows of the Decon Expert table, shown with Show Advanced in the Decon dropdown. Until October 2026 the unsharp-mask rows were named Sharpen* (SharpenAmount and so on); the old names are still accepted in saved settings, job files and on the command line.
| Setting | Default | What it does |
|---|---|---|
| SharpenFill | 0 | Restores the detail the decon left short, in percent: 100 restores all of it. BiggSky measures the gap from the decon itself: the fitted PSF, how much the decon boosted each scale, and the stack's noise model. It boosts each scale only as far as that scale's signal-to-noise justifies, and only down to the scale where the signal reaches the noise. On our lunar test data this is a gain of about 1.05 at 20 px scales rising to 1.2–1.3 at 5 px, for 9–20% more noise. It reads the noise from the stack's noise model, or from BiggSky's estimate for a stack that has none (an AutoStakkert stack, for example), which is less exact; when there is no noise to read the log says fill was not applied. 0 = off. |
| SharpenFillMax | 1.6 | The largest boost SharpenFill may apply at any scale. |
| UnsharpAmount | 0 | The dialog's Amount: peak gain 1 + UnsharpAmount. 0 = off. |
| UnsharpRadius | 4.4 | The dialog's Radius, in capture pixels. |
| UnsharpPasses | 1 | The dialog's Passes. |
| UnsharpRollOff | 0 | The dialog's Finest detail, in cycles per capture pixel. 0 = Auto: the frequency where the stack's signal falls to 3 times its noise. |
| UnsharpHaloClamp | 2 (Planetary: -1) | The dialog's Halo clamp, in percent; -1 = off. Off by default on planets, where it flattens fine low-contrast structure such as Saturn's rings. |
| UnsharpProtectSky | 1 | The dialog's Protect sky: 1 = the sharpening (Fill and Amount) fades out on the sky and night side; 0 = sharpen everywhere. |
SharpenFill and UnsharpAmount can be used together: Fill restores what the decon missed, and Amount adds sharpening to taste on top. With both at 0 nothing is sharpened, and the decon's results are identical to a decon without these settings.
The log records what was done, for example:
Post-decon sharpen: fill 100%: gain 1.05 1.09 1.13 1.17 at 0.05/0.10/0.15/0.20 cyc/capture px (SNR 1 at 0.311); sharpen 0.50 at radius 4.4 capture px (roll-off at SNR 3, 0.264 cyc/capture px): gain 1.33 1.50 1.45 1.38 1.23 at 0.05/0.10/0.15/0.20/0.30; halo clamp 2%; sky protected (41% of the image unsharpened, 4% in the fade) (54 object tiles)
From the command line:
BiggSkyCLI process moon.ser -t lunar --decon UnsharpAmount=0.5 --decon UnsharpRadius=4.4
BiggSkyCLI process moon.ser -t lunar --decon SharpenFill=100
The sharpen tool command has the same option: BiggSkyCLI sharpen moon_Decon_32b.tif -t lunar --opt ProtectSky=false.
To use the same settings every time, save them in a profile (see the BiggSkyCLI guide): BiggSkyCLI profile save default -t lunar --decon UnsharpAmount=0.5.
Which to use? The dialog is the quickest way to find settings you like, because you can try several on the same image. Once you know them, put them in the Expert table, or a profile, so every decon is sharpened the same way and the plain decon is still saved beside it.
The sharpened image always goes to Calc, so your Decon result is never changed and you can compare the two. See also the Deconvolution Expert settings, the BiggSkyCLI manual and the full BiggSky manual.